The Ultimate Guide to Making the Perfect Vanilla Sponge Cake at Home: A Foolproof Recipe for Beginners
Picture this: you walk into your kitchen on a quiet Sunday afternoon, and within an hour, the entire house fills with the heavenly scent of freshly baked vanilla sponge cake. Your family gathers around as you slice into that golden, cloud-like creation, watching their faces light up with pure joy. This isn’t just a dream—it’s completely achievable when you master the art of homemade vanilla sponge cake.
Whether you’re baking for a special celebration or simply craving that comforting taste of childhood, creating the perfect vanilla sponge cake at home requires more than just mixing ingredients together. You need to understand the delicate balance of technique, timing, and temperature that transforms simple pantry staples into bakery-quality magic.
Table of Contents
What Makes a Vanilla Sponge Cake Perfect?
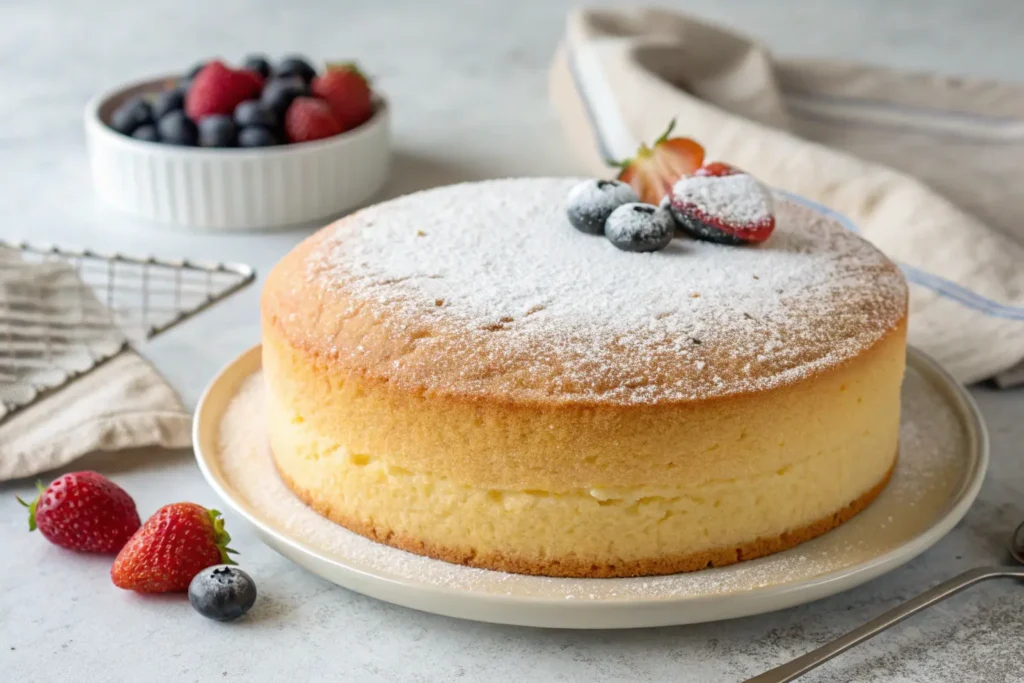
Your ideal vanilla sponge cake should possess three essential characteristics: a tender crumb that practically melts on your tongue, an airy texture that feels weightless, and a subtle vanilla flavor that serves as the perfect canvas for endless creative possibilities.
Unlike dense butter cakes, sponge cakes rely primarily on whipped eggs for their structure and lift. This fundamental difference means your technique must be precise—every fold, every mix, and every moment in the oven contributes to your final result.
The secret lies in creating and preserving tiny air bubbles throughout your batter. When done correctly, these microscopic pockets expand during baking, creating that signature light, springy texture that makes sponge cakes so beloved.
Essential Ingredients for Vanilla Sponge Cake Success
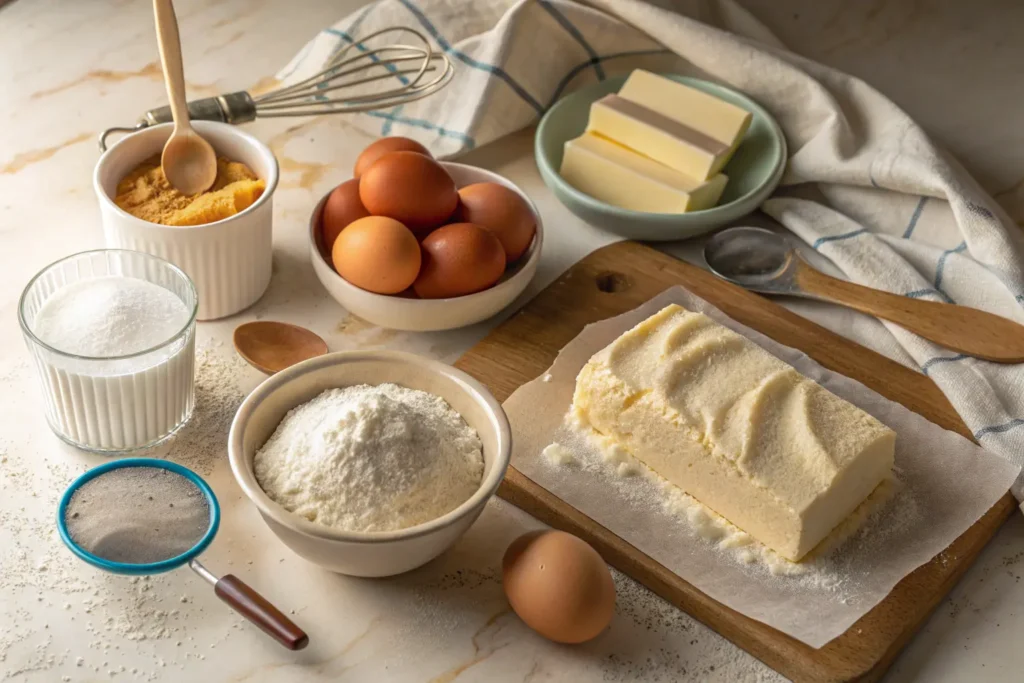
Your ingredient list might look deceptively simple, but each component plays a crucial role in achieving perfection:
| Ingredient | Quantity | Temperature | Purpose |
|---|---|---|---|
| Large Eggs | 4 | Room temperature | Structure and lift |
| Caster Sugar | 120g (½ cup) | Room temperature | Sweetness and stability |
| Self-Raising Flour | 120g (1 cup) | Room temperature | Foundation structure |
| Pure Vanilla Extract | 2 teaspoons | Room temperature | Primary flavor |
| Unsalted Butter | 2 tablespoons | Melted and cooled | Richness and moisture |
| Whole Milk | 2 tablespoons | Room temperature | Texture enhancement |
Why Room Temperature Matters
Room temperature ingredients blend together more easily, creating a smoother batter that traps air more effectively. Cold eggs won’t whip to their full volume, while warm ingredients can deflate your carefully created foam. Plan ahead by removing everything from the refrigerator about two hours before baking.
Your Step-by-Step Method for Perfect Results
Preparation Phase
Start by preheating your oven to 180°C (160°C fan-assisted). Grease an 8-inch round cake pan thoroughly, then line the bottom with parchment paper. This dual approach prevents sticking while ensuring easy removal.
Sift your flour twice into a separate bowl—this crucial step incorporates air and removes any lumps that could create dense spots in your finished cake.
The Critical Whisking Stage
Place your room-temperature eggs in a large mixing bowl, then gradually add the caster sugar. Here’s where patience becomes your greatest asset: whisk this mixture on high speed for a full 8-10 minutes until it becomes pale, thick, and triples in volume.
You’ll know you’ve achieved the perfect consistency when the mixture falls in thick ribbons that briefly hold their shape on the surface. This “ribbon stage” is non-negotiable—it’s the foundation of your cake’s texture.
Add your vanilla extract and give the mixture one final brief whisk to incorporate.
Folding in the Flour
This step separates novice bakers from experienced ones. Sift one-third of your flour directly over the egg mixture, then use a large metal spoon or rubber spatula to fold it in using gentle cutting and turning motions. Rotate your bowl as you work, ensuring even incorporation without deflating those precious air bubbles.
Repeat this process twice more until all flour disappears into the batter. Resist the urge to overmix—a few small flour streaks are preferable to a deflated, heavy cake.
Final Assembly
Combine your melted butter with the milk in a small bowl, then add this mixture to your batter in two additions. Use the same gentle folding technique, working just until everything combines.
Pour your batter into the prepared pan, gently tap it once on the counter to release any large air bubbles, then immediately transfer to your preheated oven.
Baking to Perfection
Bake for 25-30 minutes without opening the oven door—this is crucial for preventing collapse. Your cake is ready when it springs back lightly to gentle pressure and pulls slightly away from the pan sides.
Cool in the pan for exactly five minutes, then turn out onto a wire rack to cool completely. This timing prevents breaking while avoiding the cake sticking to the pan.
Troubleshooting Common Issues
Dense texture? You likely under-whisked your eggs or over-mixed the flour. Remember: 8-10 minutes of vigorous whisking, then gentle folding.
Sunken center? Your oven door opened too early, or the temperature was incorrect. Invest in an oven thermometer for accuracy.
Dry crumbs? Check your measurements and don’t overbake. The cake should feel just set, not firm.
Storage and Serving Suggestions
Your finished vanilla sponge cake stays fresh at room temperature for 2-3 days when covered, or refrigerated for up to a week. For longer storage, wrap tightly and freeze for up to three months.
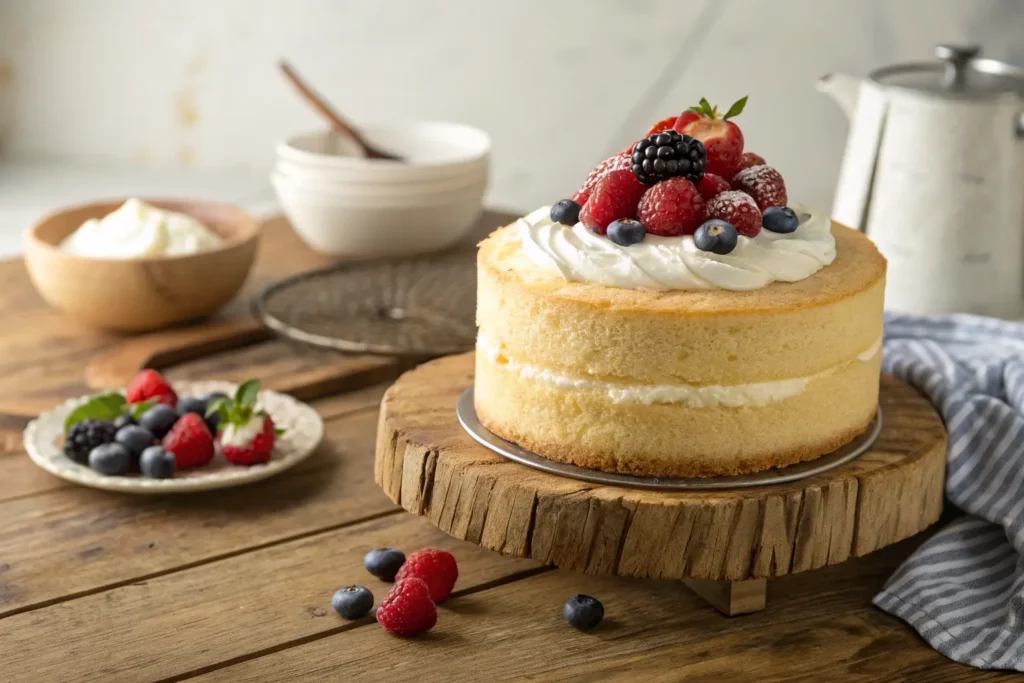
Serve simply with a dusting of powdered sugar, or transform it into an elegant dessert with fresh berries and whipped cream. This versatile base also works beautifully for layered cakes, trifles, or as the foundation for your favorite frosting.
Frequently Asked Questions About Vanilla Sponge Cake
Can I make this vanilla sponge cake without an electric mixer? While challenging, hand-whisking is possible—plan for 15-20 minutes of vigorous whisking to achieve the ribbon stage.
What if I don’t have self-raising flour? Substitute with 120g plain flour plus 1½ teaspoons baking powder, sifted together twice.
How do I know my vanilla sponge cake is perfectly baked? Look for golden edges, a springy center that bounces back from gentle pressure, and slight pulling away from pan sides.
Your Next Steps to Baking Success
Now that you possess the knowledge and technique for creating exceptional vanilla sponge cake at home, it’s time to put theory into practice. Gather your ingredients, clear your afternoon schedule, and prepare to fill your kitchen with the irresistible aroma of homemade perfection.
Remember, mastery comes through practice. Your first attempt might not be flawless, but each cake teaches valuable lessons about your oven’s quirks and your developing technique. Soon, you’ll be creating consistently beautiful results that rival any professional bakery.
Ready to start baking? Share your vanilla sponge cake creations and any questions in the comments below—fellow bakers love celebrating successes and offering helpful tips for overcoming challenges.