How to Make Butterscotch Pudding: A Rich and Creamy Classic Dessert Recipe
Picture yourself standing in your grandmother’s kitchen, watching her stir a golden mixture on the stovetop while the most incredible aroma fills every corner of the room. That first spoonful of authentic butterscotch pudding was nothing short of magical – silky, rich, and bursting with deep caramelized flavors that seemed to embrace your very soul. Today, you’ll discover how to recreate that same enchanting experience using simple techniques that transform ordinary ingredients into extraordinary comfort food.
Table of Contents
Understanding the Magic Behind Butterscotch Pudding
What Makes This Dessert So Special
Butterscotch pudding stands apart from other desserts because of its unique flavor profile. Unlike caramel-based sweets that rely on granulated sugar, authentic butterscotch derives its distinctive taste from the marriage of brown sugar and real butter. This combination creates complex notes ranging from toffee-like richness to subtle molasses undertones.
The secret lies in controlled caramelization. When you heat brown sugar with butter, chemical reactions occur that develop hundreds of flavor compounds. These reactions, known as Maillard browning, create the deep amber color and sophisticated taste that makes butterscotch pudding irresistible.
Essential Ingredients for Success
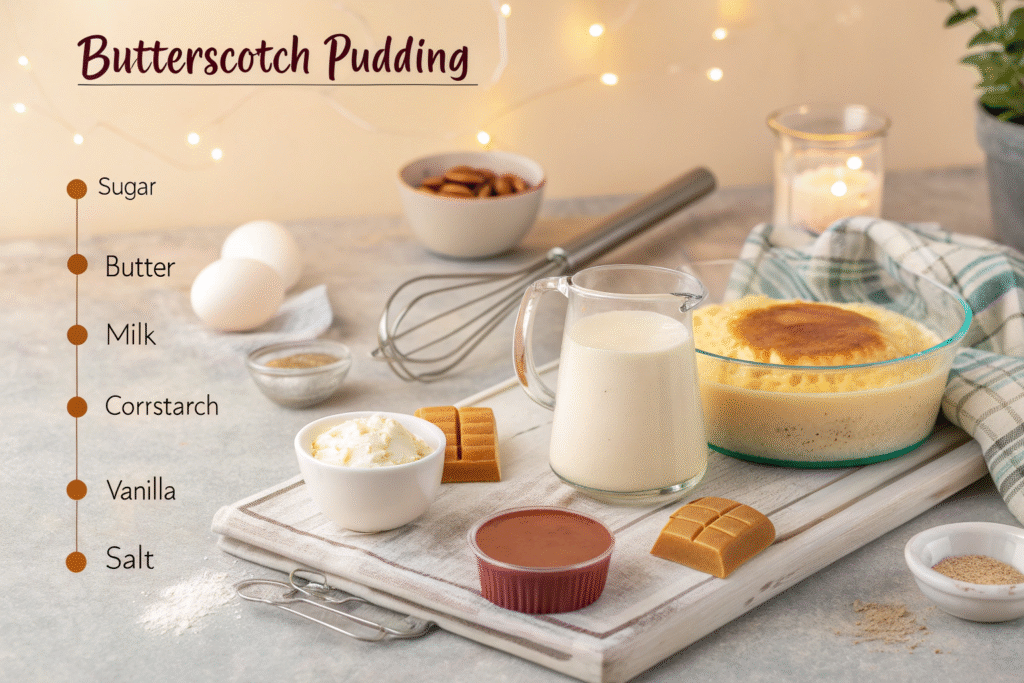
Your butterscotch pudding journey begins with selecting quality ingredients. Each component plays a crucial role in achieving that perfect texture and flavor balance.
| Ingredient | Amount | Purpose |
|---|---|---|
| Unsalted Butter | 4 tablespoons | Creates butterscotch base |
| Dark Brown Sugar | 3/4 cup | Primary sweetener & flavor |
| Heavy Cream | 1 1/2 cups | Richness and creaminess |
| Whole Milk | 1 cup | Base liquid |
| Large Egg Yolks | 4 | Thickening agent |
| Cornstarch | 3 tablespoons | Additional thickener |
| Pure Vanilla Extract | 2 teaspoons | Flavor enhancement |
| Salt | 1/4 teaspoon | Flavor balancer |
Choose European-style butter with higher fat content for superior flavor development. Dark brown sugar contains more molasses than light varieties, contributing to deeper butterscotch character. Fresh, high-quality cream makes the difference between good and exceptional results.
Step-by-Step Butterscotch Pudding Recipe
Creating Your Butterscotch Base
Begin by melting your butter in a heavy-bottomed saucepan over medium heat. Watch carefully as it transforms from pale yellow to golden, releasing nutty aromas. This browning process, called beurre noisette, adds complexity to your final dessert.
Add brown sugar gradually, whisking constantly to prevent crystallization. The mixture will bubble vigorously – this reaction creates those coveted butterscotch flavors. Continue cooking for 2-3 minutes until the sugar dissolves completely and the mixture darkens to deep amber.
Building the Custard Foundation
Temperature control becomes critical during this phase. Reduce heat to medium-low before adding your cream and milk mixture. The dramatic temperature difference could cause splattering, so pour slowly while whisking continuously.
In a separate bowl, whisk egg yolks with cornstarch until smooth. This technique, called tempering, prevents the eggs from scrambling when added to hot liquid. Gradually pour about one cup of the warm cream mixture into the egg yolks, whisking constantly.
Return the tempered mixture to your saucepan and increase heat to medium. Whisk continuously as the pudding thickens, approximately 3-5 minutes. You’ll know it’s ready when it coats the back of a spoon and holds its shape briefly when lifted.
Finishing Touches
Remove your pudding from heat and immediately stir in vanilla extract and salt. The residual heat will distribute these flavors evenly throughout. Strain the mixture through a fine-mesh sieve to eliminate any lumps, ensuring silky smoothness.
Press plastic wrap directly onto the pudding surface to prevent skin formation. This direct contact method maintains the creamy texture you’ve worked hard to achieve.
Professional Tips for Perfect Results
Avoiding Common Pitfalls
Temperature management prevents most butterscotch pudding disasters. Never rush the cooking process with high heat – patience rewards you with smooth, lump-free results. If your mixture appears grainy, you’ve likely overheated the eggs or sugar.
Constant whisking during the thickening phase prevents sticking and ensures even cooking. Your arm might tire, but consistent motion creates that coveted creamy consistency.
Enhancing Your Creation
Consider these flavor variations to personalize your butterscotch pudding:
- Salted Butterscotch: Add an extra pinch of sea salt for contemporary appeal
- Bourbon Butterscotch: Incorporate one tablespoon of quality bourbon after cooling
- Spiced Version: Include cinnamon, nutmeg, or cardamom during the browning phase
Serving and Storage Guidelines
Presentation Ideas
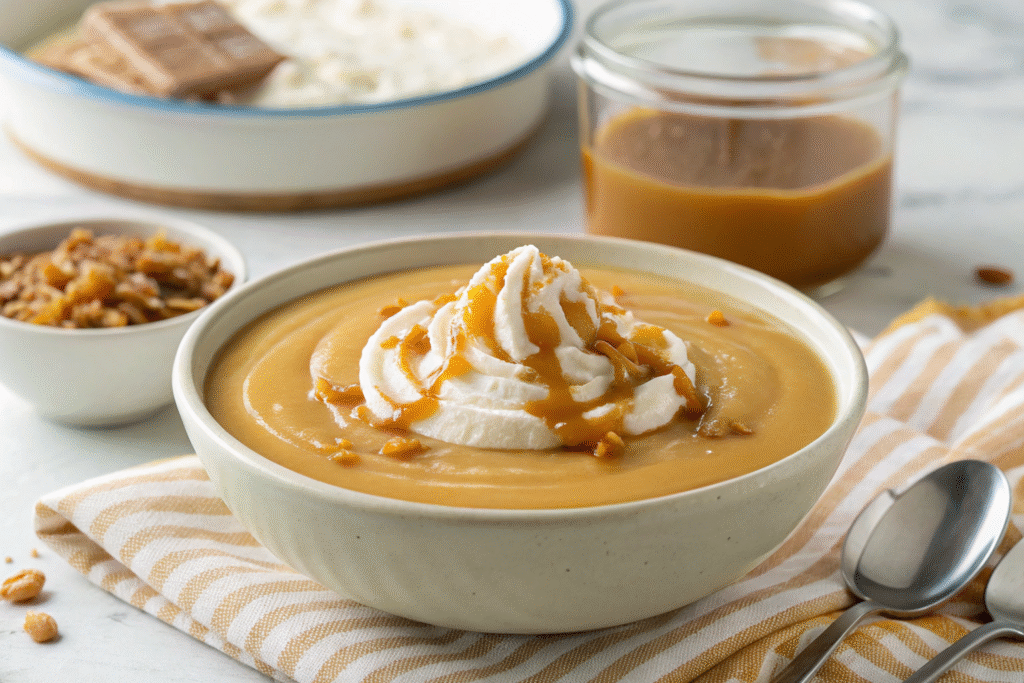
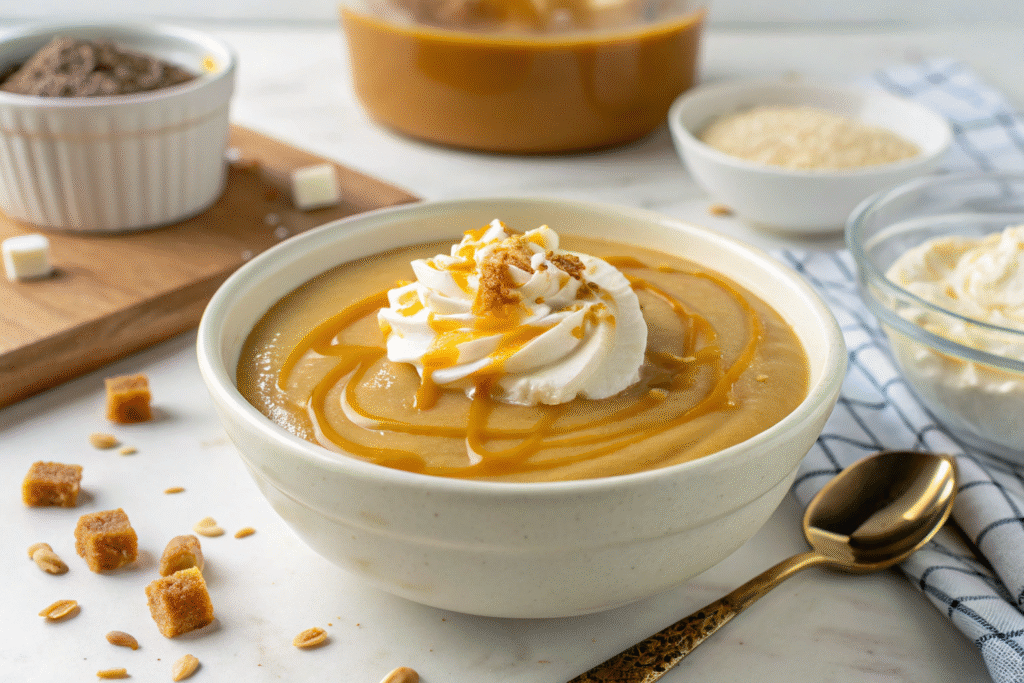
Serve your butterscotch pudding in elegant glass cups to showcase its beautiful amber color. Top with freshly whipped cream and a sprinkle of crushed gingersnaps for textural contrast. Toasted pecans or a drizzle of caramel sauce elevate the presentation further.
For special occasions, layer your pudding with vanilla wafers and whipped cream to create impressive parfaits. The combination of creamy butterscotch with crunchy elements provides delightful textural variety.
Proper Storage Methods
Refrigerate your finished pudding for at least two hours before serving. Properly stored butterscotch pudding maintains quality for three to four days when covered tightly. Always keep plastic wrap in direct contact with the surface to prevent skin formation.
Frequently Asked Questions
Why did my butterscotch pudding turn grainy? Graininess typically results from overheating eggs or inadequate whisking. Always use medium-low heat and whisk constantly during the thickening process.
Can I make butterscotch pudding ahead of time? Absolutely! Butterscotch pudding actually improves in flavor after overnight chilling. The ingredients meld together, creating deeper, more complex taste.
How do I fix thin pudding? Return thin pudding to the stove and create a slurry using one tablespoon cornstarch mixed with two tablespoons cold milk. Whisk this mixture into your pudding while heating gently until desired thickness develops.
Transform Your Kitchen into a Dessert Paradise
Mastering butterscotch pudding connects you to generations of home cooks who understood that exceptional desserts require patience, quality ingredients, and attention to detail. This rich, creamy classic transforms simple pantry staples into something truly extraordinary.
The satisfaction of creating restaurant-quality dessert in your own kitchen cannot be overstated. Each spoonful delivers complex butterscotch flavors that store-bought versions simply cannot match. Your family and friends will request this recipe repeatedly, cementing your reputation as a skilled dessert creator.
Ready to embark on your butterscotch pudding adventure? Gather your ingredients, clear your schedule for unhurried cooking, and prepare to fill your kitchen with the most incredible aromas. Share your results in the comments below – we’d love to hear about your butterscotch pudding successes and any creative variations you discover along the way!