How to Make the Perfect Red Velvet Cake at Home: A Baker’s Complete Guide
Do you remember that first bite of authentic red velvet cake that completely changed your perspective on dessert? The way the tender, moist crumb practically dissolved on your tongue, followed by that perfect harmony of subtle chocolate notes and tangy cream cheese frosting? For countless home bakers, red velvet cake represents more than just another dessert recipe—it’s a culinary challenge that has humbled even experienced kitchen enthusiasts.
Perhaps you’ve attempted making red velvet cake before, only to end up with something resembling chocolate cake wearing red makeup, or worse, a dense brick that bore no resemblance to the bakery masterpiece you envisioned. You’re certainly not alone in this struggle. The perfect red velvet cake has mystified home bakers for decades, hidden behind conflicting recipes and vague instructions that promise restaurant-quality results but deliver disappointment.
Today marks the end of your red velvet cake frustrations. You’re about to discover the closely guarded secrets that separate amateur attempts from professional-quality creations, transforming your kitchen into a red velvet cake sanctuary.
Table of Contents
Understanding the Science Behind Red Velvet Cake Success
Your red velvet cake journey begins with understanding what makes this dessert truly special. Unlike regular chocolate cake, red velvet contains minimal cocoa powder—typically just two to three tablespoons—creating a subtle chocolate undertone rather than dominant chocolate flavor. The signature texture emerges from a fascinating chemical reaction between acidic ingredients like buttermilk and vinegar with baking soda, producing the characteristically tender crumb that distinguishes authentic red velvet cake.
The iconic crimson color originally developed naturally through the interaction between cocoa’s natural compounds and acidic ingredients. Modern recipes rely on food coloring to achieve consistent results, but understanding this scientific foundation helps you troubleshoot common problems and achieve professional-quality outcomes.
Essential Ingredients for Authentic Red Velvet Cake
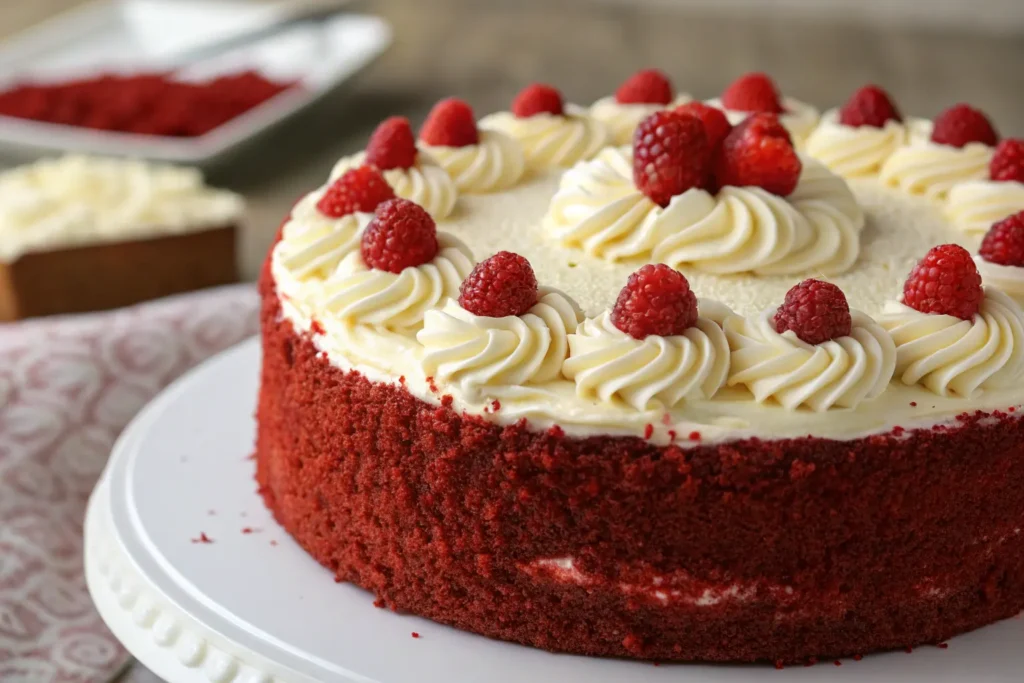
Your ingredient selection directly impacts your final results, making quality choices crucial for success. Here’s what you’ll need for perfect red velvet cake:
Core Cake Ingredients:
- 2½ cups all-purpose flour (unbleached preferred)
- 1½ cups granulated sugar
- ½ cup unsalted butter (room temperature)
- 2 large eggs (room temperature)
- 1 cup buttermilk (full-fat)
- 2 tablespoons red gel food coloring
- 2 tablespoons unsweetened cocoa powder
- 1 tablespoon white vinegar
- 1 teaspoon baking soda
- 1 teaspoon vanilla extract
- ½ teaspoon salt
Cream Cheese Frosting Components:
- 16 oz cream cheese (room temperature)
- ½ cup unsalted butter (softened)
- 4 cups powdered sugar (sifted)
- 2 teaspoons vanilla extract
Ingredient Quality Makes the Difference
Room temperature ingredients create proper emulsification, ensuring your red velvet cake achieves the smooth, uniform texture that separates professional results from amateur attempts. Cold ingredients resist combining properly, leading to lumpy batter and uneven texture.
Choose gel food coloring over liquid varieties for vibrant color without compromising batter consistency. Gel coloring provides intense color saturation while maintaining proper moisture balance throughout your cake layers.
Step-by-Step Red Velvet Cake Preparation
Preparation Phase
Begin by preheating your oven to 350°F and preparing two 9-inch round cake pans. Grease thoroughly, line bottoms with parchment paper, then dust lightly with cocoa powder. This prevents sticking while maintaining color consistency.
Ensure all ingredients reach room temperature—this step cannot be rushed or skipped. Cold eggs and buttermilk create mixing difficulties that result in dense, uneven texture.
Creating Perfect Red Velvet Cake Batter
Start by creaming butter and sugar together for four to five minutes until the mixture becomes light and fluffy. This incorporates air that contributes to your cake’s tender texture. Add eggs individually, beating thoroughly after each addition to maintain emulsification.
Create your color mixture by combining red food coloring with cocoa powder until you achieve a smooth paste. This technique distributes color evenly while preventing streaking throughout your finished cake.
Add the color mixture to your butter base, mixing until completely incorporated. The batter should display uniform crimson color without streaks or patches.
Alternate adding flour mixture and buttermilk in three additions, beginning and ending with flour. Mix just until combined—overmixing develops gluten strands that create tough, chewy texture rather than the tender crumb you’re seeking.
The Critical Final Step
Combine vinegar and baking soda in a small bowl, then immediately fold into your batter. This chemical reaction creates the signature rise and texture that defines authentic red velvet cake. Work quickly but gently, mixing just until the fizzing subsides.
Mastering Cream Cheese Frosting
Your frosting quality dramatically impacts the overall dessert experience. Begin with completely softened cream cheese—it should yield easily to light pressure but not feel warm or oily.
Beat cream cheese alone for three to four minutes until completely smooth and lump-free. Gradually add softened butter, continuing to beat until the mixture becomes light and fluffy. This process cannot be rushed; proper incorporation prevents grainy texture.
Sift powdered sugar before adding to eliminate lumps that create unpleasant texture. Add sugar gradually while beating continuously, then incorporate vanilla extract. If your frosting seems too thick, add heavy cream one tablespoon at a time until you achieve perfect spreading consistency.
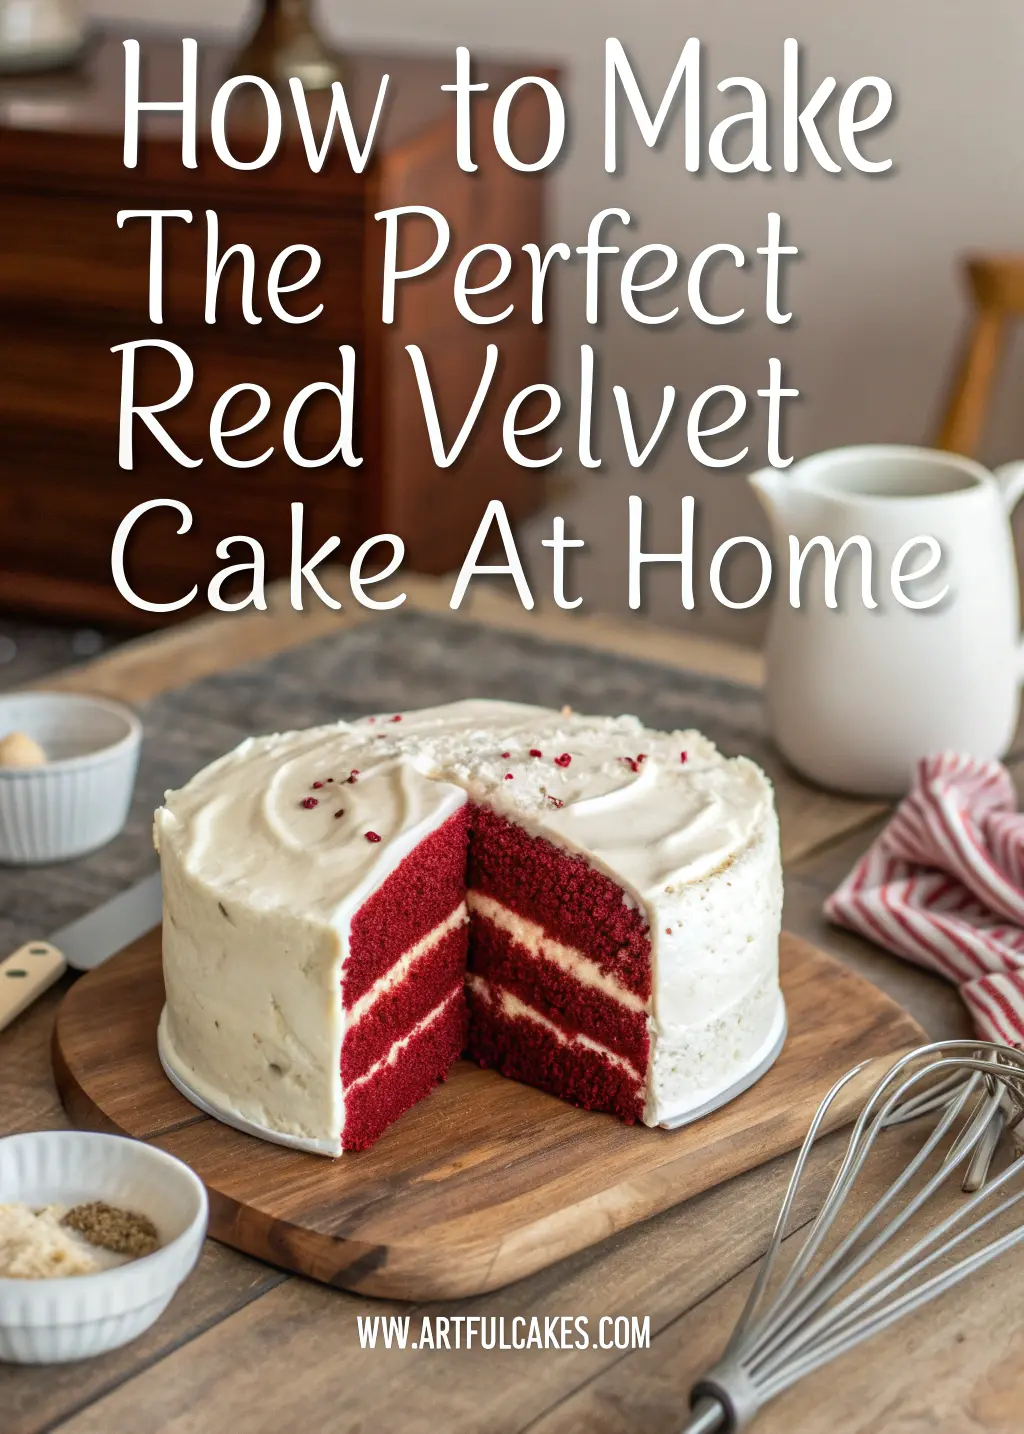
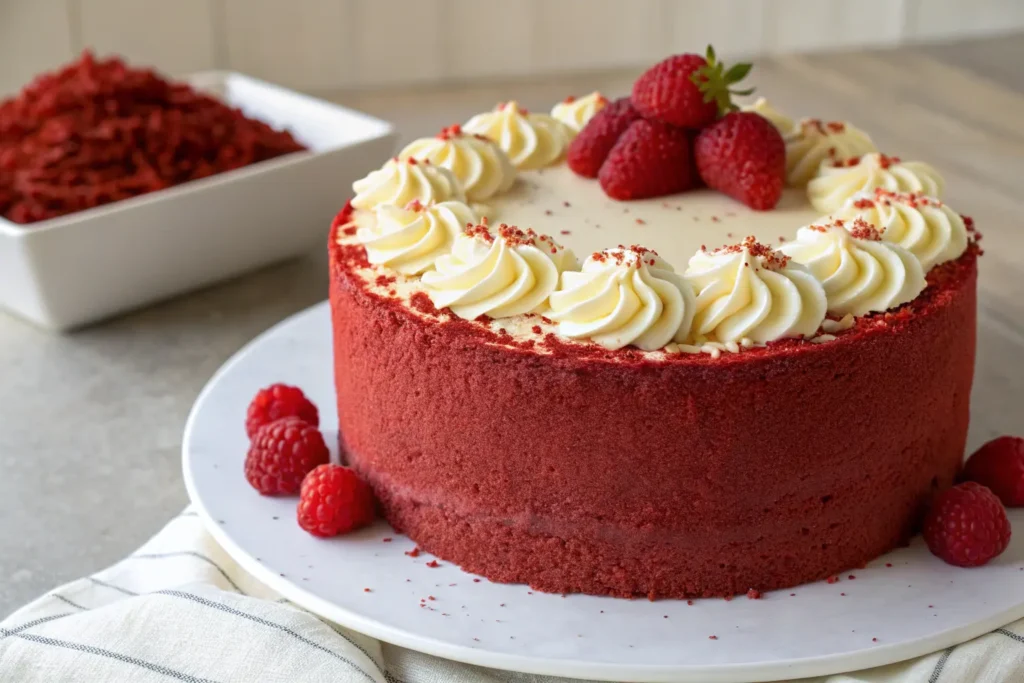
Assembly and Professional Finishing
Allow cake layers to cool completely before assembly—warm cake melts frosting and creates structural problems. Level tops with a serrated knife if necessary, removing any domed portions for even layering.
Apply a thin crumb coat first, sealing loose crumbs before adding the final frosting layer. Chill the crumb-coated cake for thirty minutes, then apply your final frosting layer using an offset spatula for smooth, professional appearance.
Troubleshooting Common Red Velvet Cake Problems
Color Issues: If your red velvet cake appears brown rather than red, you likely used too much cocoa powder or liquid food coloring instead of gel. Natural cocoa powder also reacts differently than Dutch-processed varieties, affecting both color and flavor.
Texture Problems: Dense, heavy texture typically results from cold ingredients, overmixing, or expired baking soda. Ensure fresh leavening agents and proper mixing techniques for optimal results.
Frosting Failures: Runny frosting indicates ingredients were too warm or liquid was added too quickly. Chill the frosting briefly and re-whip if needed.
Storage and Make-Ahead Strategies
Your finished red velvet cake maintains optimal quality for three to four days when stored properly at room temperature, or up to one week refrigerated. The high moisture content from buttermilk helps preserve freshness longer than many cake varieties.
For make-ahead convenience, bake layers up to three days in advance, wrapping tightly and storing at room temperature. Prepare frosting the day before use, re-whipping briefly before application to restore proper texture.
Transform Your Baking Today
Creating exceptional red velvet cake at home requires understanding the science behind the process, respecting quality ingredient selection, and executing proper techniques with patience and precision. You now possess the complete knowledge needed to produce bakery-quality results that will impress family and friends while satisfying your own desire for dessert perfection.
The difference between mediocre attempts and extraordinary red velvet cake lies in attention to detail—proper ingredient temperatures, gentle mixing techniques, and understanding the chemical reactions that create the signature texture and flavor profile.
Your kitchen awaits transformation into a red velvet cake production center. Gather your premium ingredients, prepare your equipment, and begin creating the memorable dessert experiences that only perfect red velvet cake can provide. The journey from novice baker to red velvet cake expert starts with your very next attempt.